Add your first computer
When you add a computer, wsp installs itself there and copies the setup that you pick from this computer. Then threads can run on that computer, and you see them in the same sidebar.
Before you start, make sure that you have these items:
- A Linux computer that this computer can reach over SSH. A server you rent, an old laptop or a desktop under the desk is good.
- A login on it that is root, or a login whose
sudoruns commands as root. - systemd with cgroup v2 on that computer, and free space on its disk.
If the computer is behind a firewall and you cannot reach it over SSH, read Computers behind a firewall.
In the app
-
Go to Settings, then Computers, and select Add a computer. You can also select Add a computer in the computer filter at the top of the sidebar.
-
Type the login as
user@hostor as an alias from your SSH configuration. You can also pick a host from the list From your ssh config.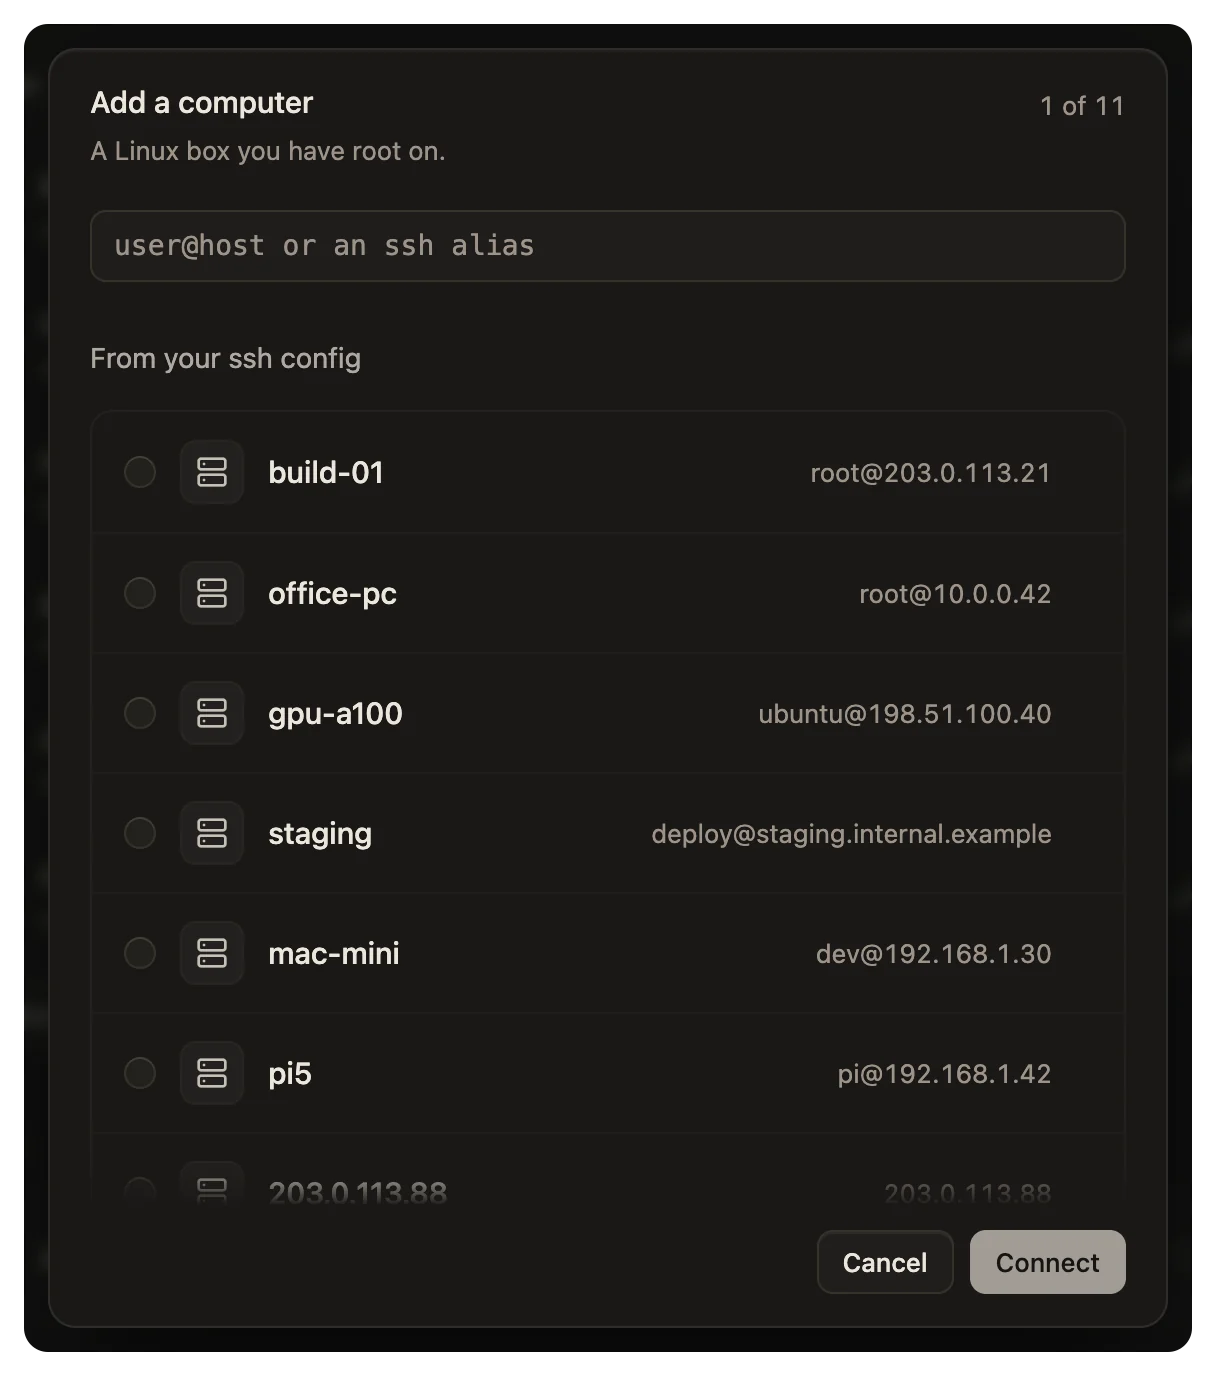
-
Select Connect.
-
If the computer's host key is new to this computer, the dialog shows the key. Compare it with the key that the other computer shows for itself. If the keys are the same, select Trust and connect. If they are not the same, select Cancel.
-
Wait for the checks. wsp makes sure that it can reach the computer and run there. Then it installs itself on the computer.
-
If the login's
sudoasks for a password, type it in the field under the check that failed. Then select Try again. The password goes tosudoon that computer, and wsp does not keep it. -
Select Continue.
Next, the dialog asks what goes on the computer, one step at a time. By default, each step ticks the items that this computer has. Untick the items that you do not want.
The CLIs step is different. It starts with nothing ticked. If your agents ran some of the tools, the step shows a Select the ones your agents used button, which ticks those tools.
| Step | What it puts on the computer |
|---|---|
| Start from | Everything on this computer, a recipe that you saved, or nothing. This step shows only if you saved a recipe. |
| Agents | The coding agents to install, signed in so that threads run there. |
| MCP servers | The tool servers that your agents use, set up for them. |
| CLIs | The command line tools that your agents run. Nothing is ticked at first, and the tools that your agents used most come first. |
| Skills | Your agents' skills, copied so that they work the same on the new computer. |
| Plugins | Claude Code plugins. |
| GitHub | How the computer signs in to GitHub to clone and push your repos. |
| Import projects | Projects on this computer to clone onto the new computer. |
| Other config | Your git and shell settings. |
| Summary | What goes on the computer, and the disk space that it needs. |
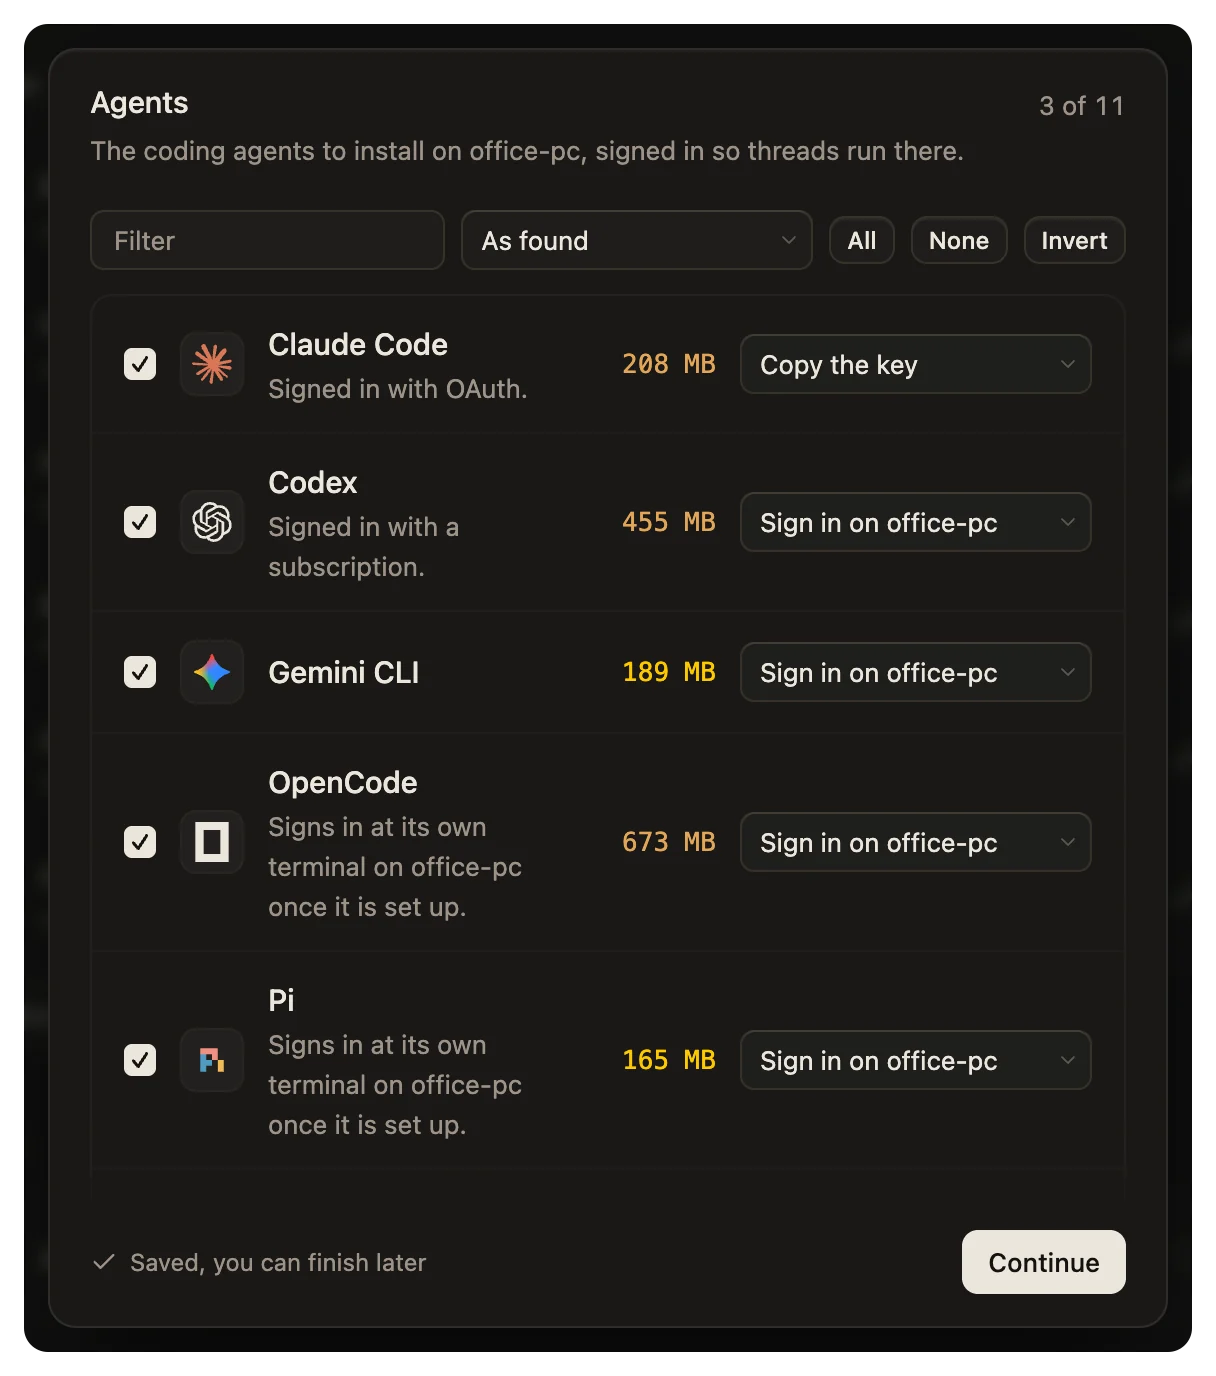
On the Summary step, select Set up and the computer's name. The setup runs step by step. You can close the dialog, and the setup continues. wsp tells you when a step needs you, for example a sign-in that opens a page in your browser.
When the setup is done, the dialog says that the computer is ready. The computer is now in Settings, then Computers, and in the computer filter of the sidebar.
To keep your picks for the next computer, turn on Save as a recipe on the Summary step. If you close the dialog before Set up, wsp keeps your picks. To finish later, select the computer in Settings, then Computers.
From the command line
Run wsp add with the login of the computer:
wsp add root@203.0.113.7
wsp add logs in over SSH as your own SSH client does. Then it makes these steps, and it prints each step as it happens:
- It shows the host key if the computer is new to this computer, and asks you to trust it.
- It makes sure that it can run wsp there.
- It installs wsp on the computer and waits until the computer connects back.
- It puts the base tools on the computer.
If sudo on that computer asks for a password, wsp add asks for it once in your terminal.
Without a recipe, the computer then waits for you to pick what goes on it. To pick, open the app and finish the steps of Add a computer. To set it up from a recipe that you saved, run wsp add <computer> --resume --recipe <name>. wsp recipes lists your recipes.
These flags change how wsp add reaches the computer:
--name <name>gives the computer a name in wsp. Without it, wsp uses the computer's hostname, or the alias that you typed.--ssh-port <port>dials SSH on a port other than 22.--ssh-key <path>logs in with that key file.--host-key <key>gives the host key that you read on the computer. Off a terminal,wsp addcannot ask you, so a new computer needs this flag.--recipe <name>sets the computer up from a saved recipe.
Run a thread on the new computer
A project lives on one computer. To run threads on the new computer, use a project on it:
- The projects that you picked in the Import projects step are on the computer when the setup ends.
- In the app, select Add a project, paste a repository address and pick the computer. The computer clones the repo.
- From the command line, run
wsp add <url> --on <computer>. To clone with the GitHub sign-in on that computer, runwsp add <owner/repo> --on <computer>.
Then start a thread on that project as on your first thread. Under the box, the app names the computer that the thread runs on.
Add a computer, and what it copies tells you more about each step.