Add a computer, and what it copies
You can add a Linux computer that you reach over ssh, such as a server you rent or a desktop at home. wsp installs itself there, puts on the agents, tools and settings you pick, and the computer joins your sidebar. Threads then run on it the way they run on your computer.
To add a computer that you cannot reach over ssh, see Computers behind a firewall.
What the computer needs
The Checks step tests each of these before anything goes on the computer:
- Linux on an
x86_64oraarch64chip. - A login that can run commands as root:
rootitself, passwordless sudo, or sudo with a password you type in the dialog. wsp keeps the password nowhere. wsp needs root because it runs as a system service. - systemd, and cgroup v2.
- A login shell of
bashorshfor root, and a home folder other than/. - Free disk for the base tools and 1 GiB more.
- A way back to the computer the app runs on. Either the new computer reaches it directly, or wsp holds a forward back over ssh.
Start the add
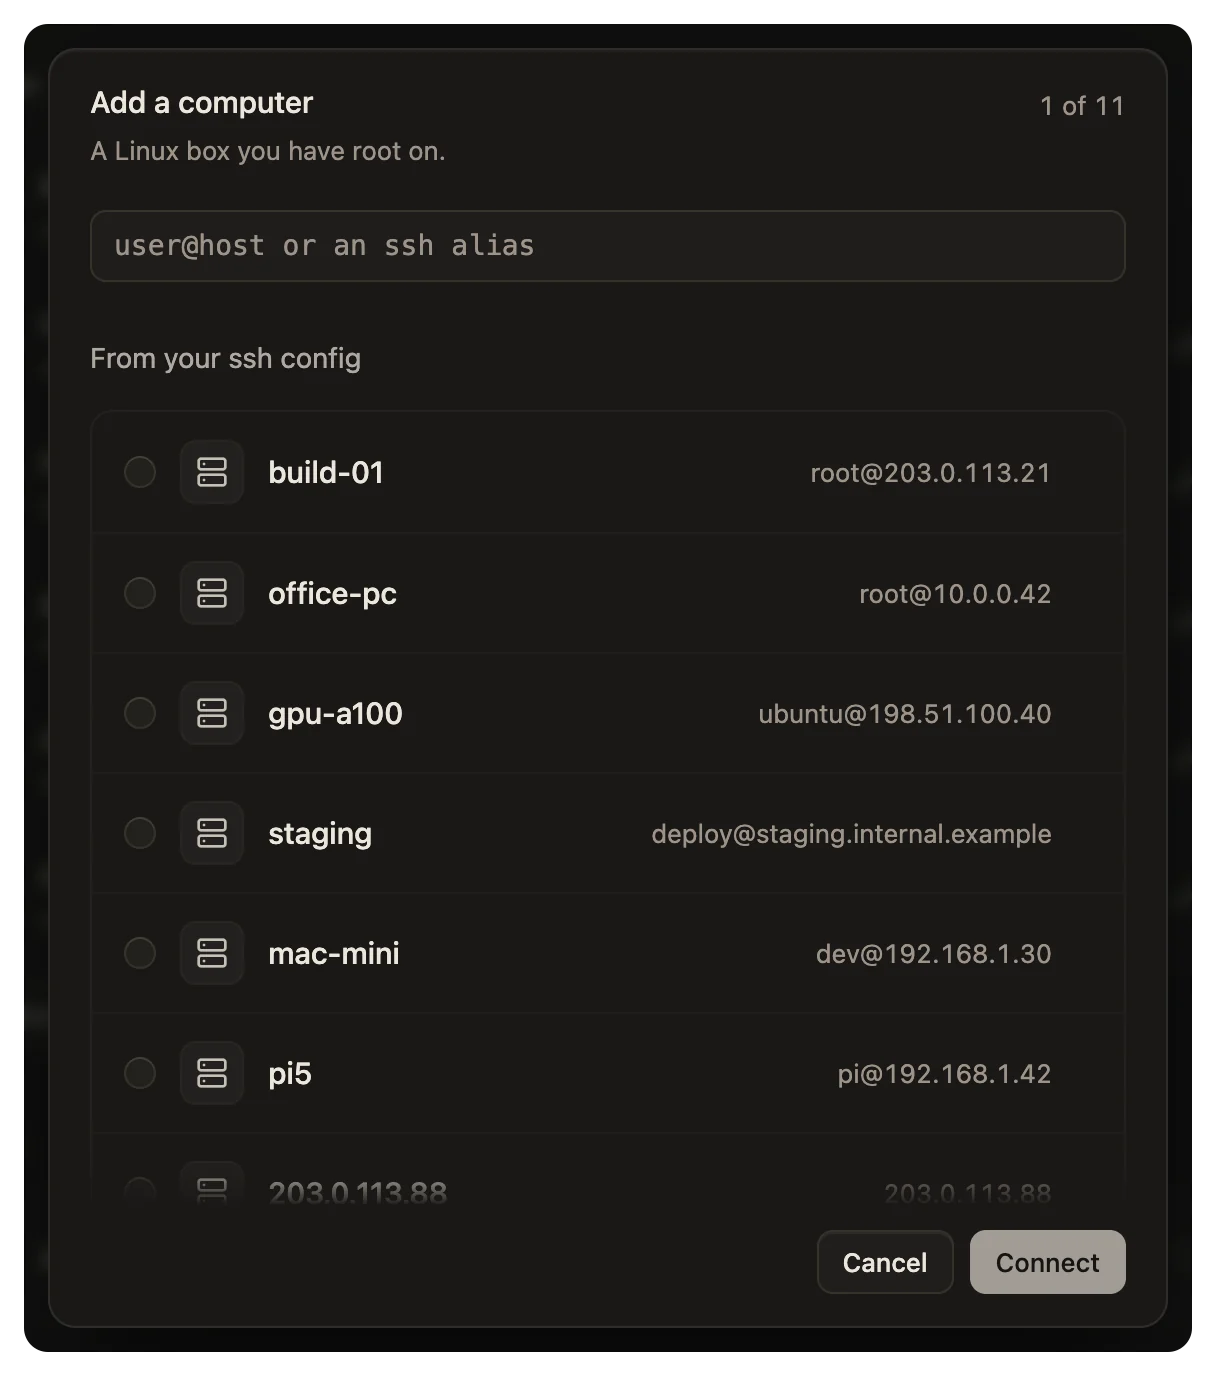
Open Settings > Computers and click Add a computer. Type a login such as root@203.0.113.7 or an ssh alias, or pick a host under From your ssh config. Then click Connect.
If the computer's host key is new to you, the dialog shows it and the button says Trust and connect.
The steps
The dialog walks these steps in order. Start from shows only when you saved a recipe before.
| Step | What it does |
|---|---|
| Checks | Making sure wsp can reach the new computer and run there. |
| Start from | Begin with everything on your computer, a saved recipe, or nothing. |
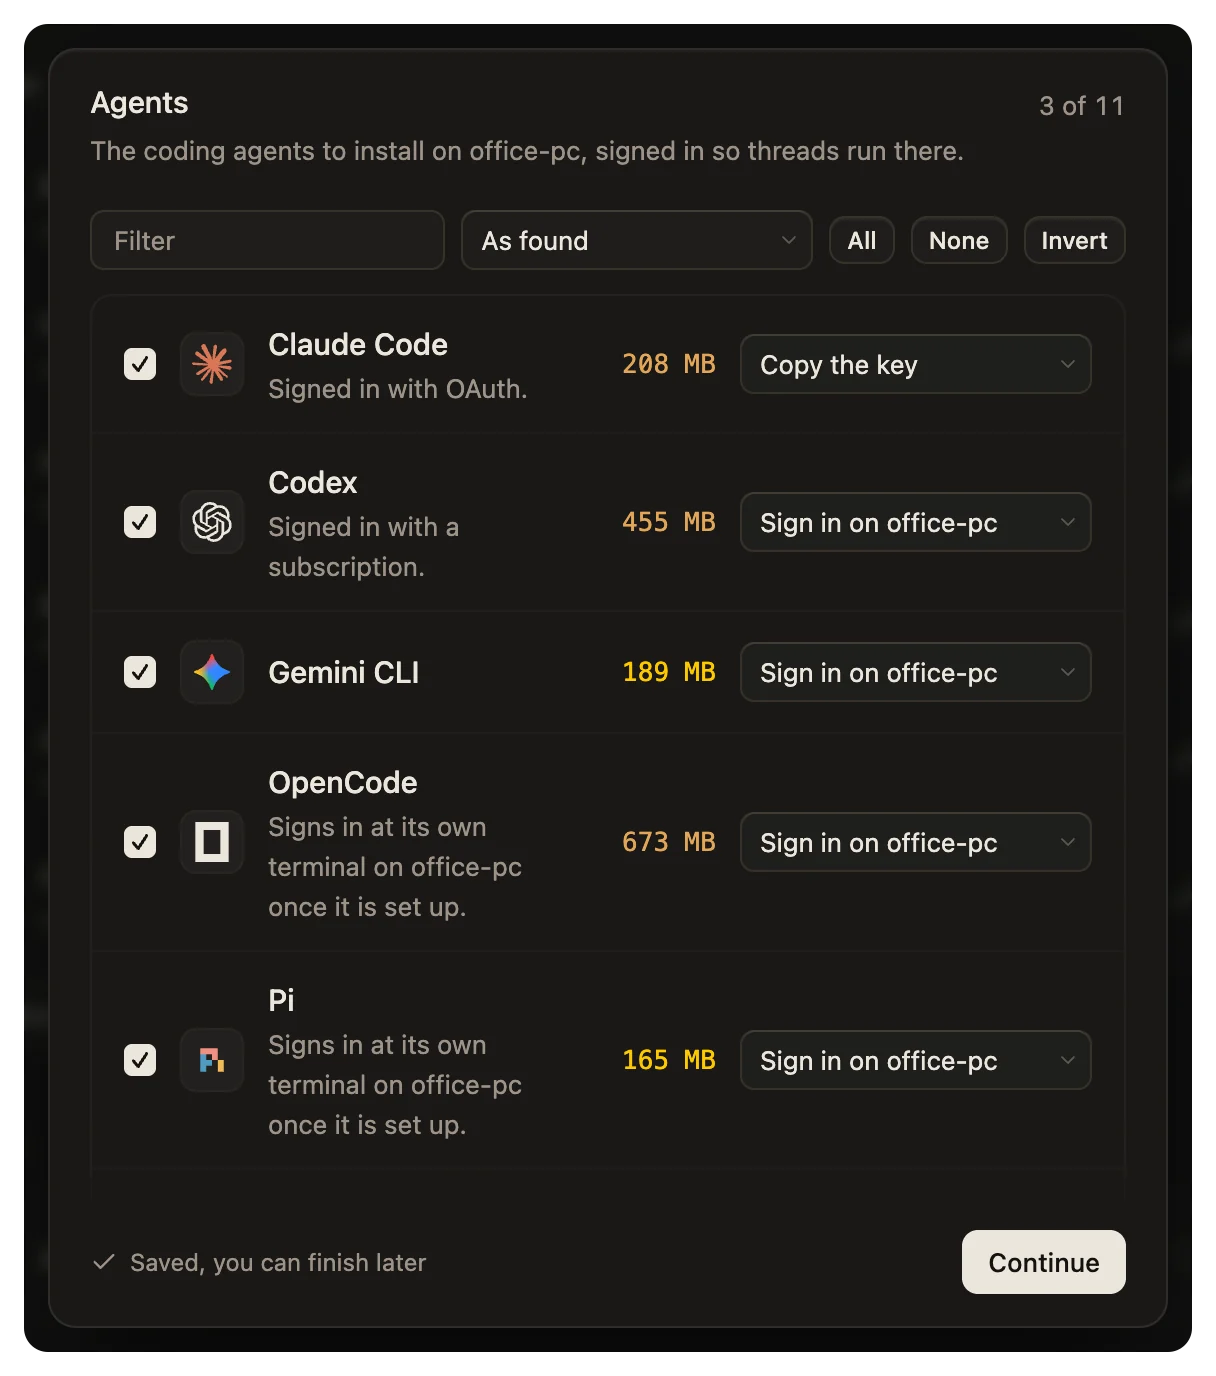
| Agents | The coding agents to install on the new computer, signed in so threads run there. |
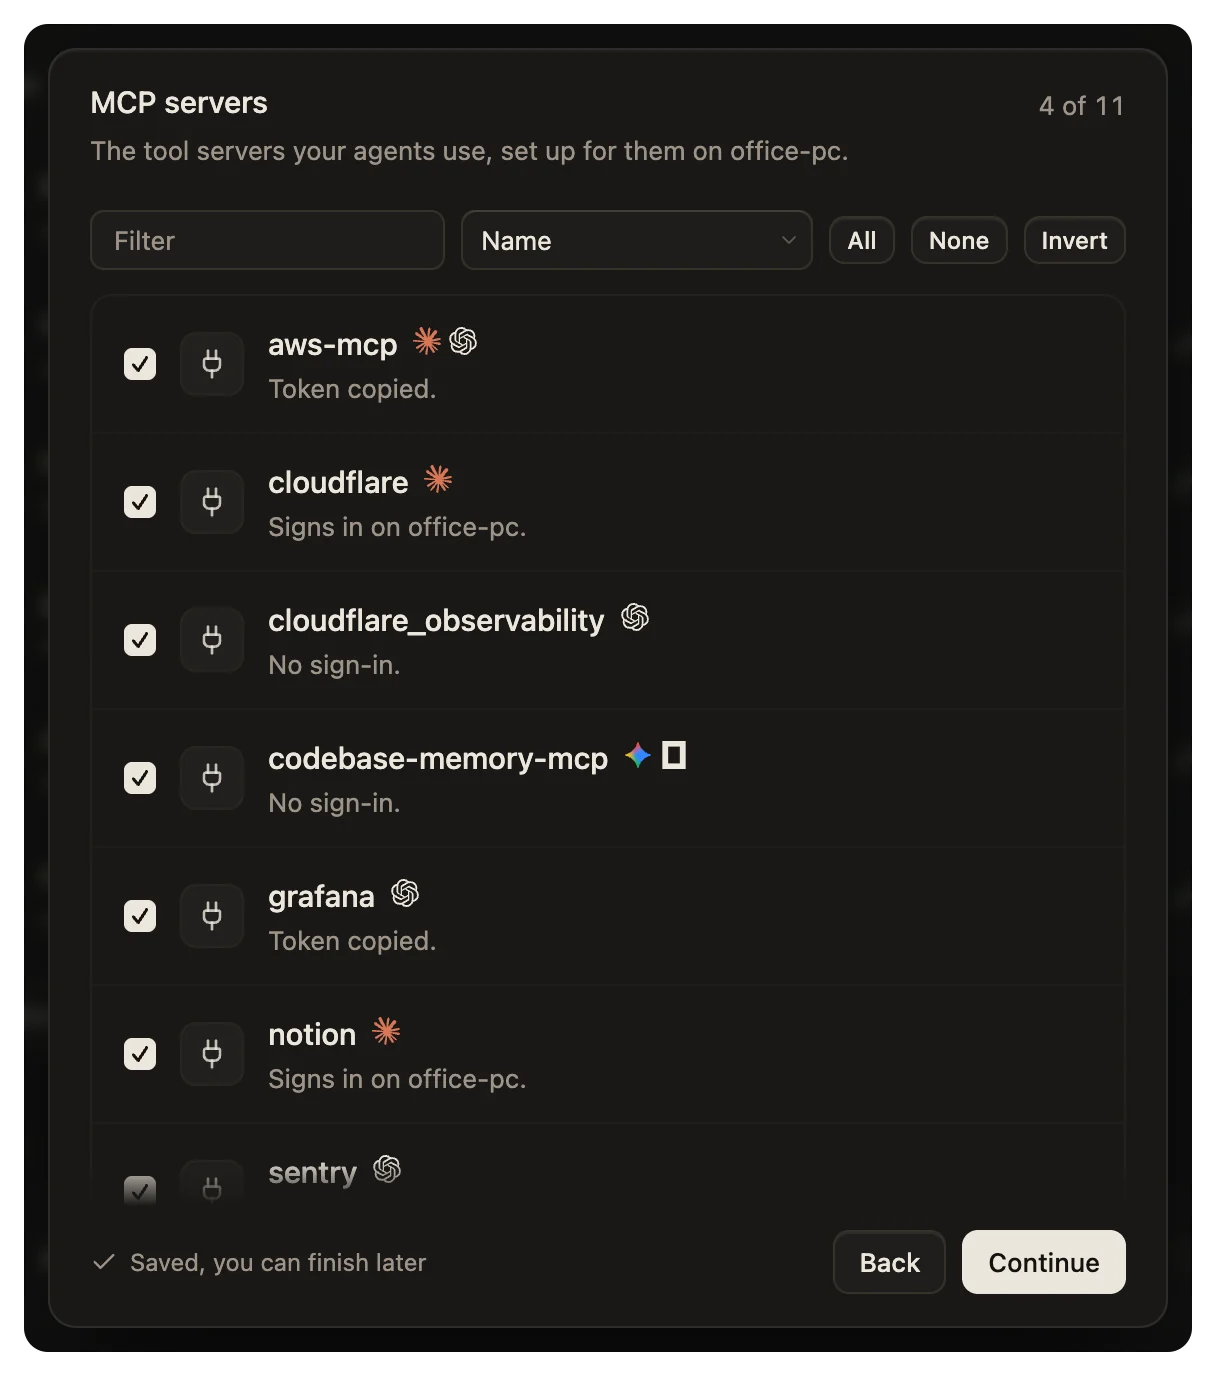
| MCP servers | The tool servers your agents use, set up for them on the new computer. |
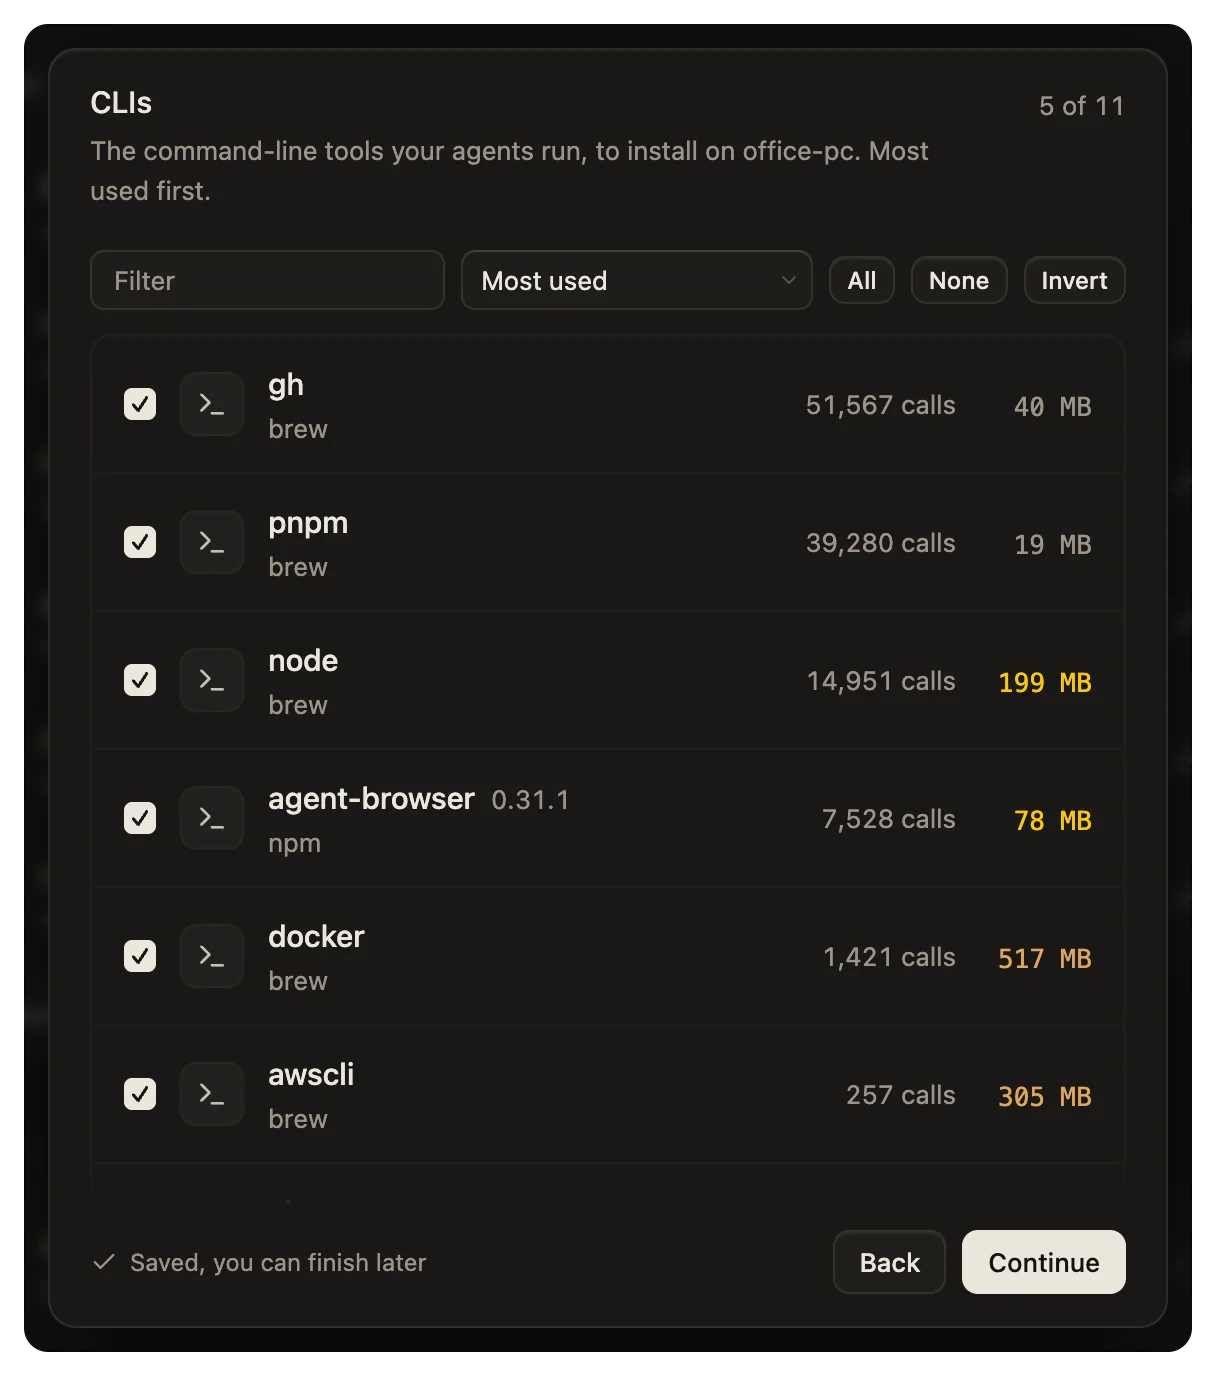
| CLIs | The command-line tools your agents run, to install on the new computer. Most used first. |
| Skills | Your agents' skills, copied so they work the same on the new computer. |
| Plugins | Claude Code plugins to install on the new computer. |
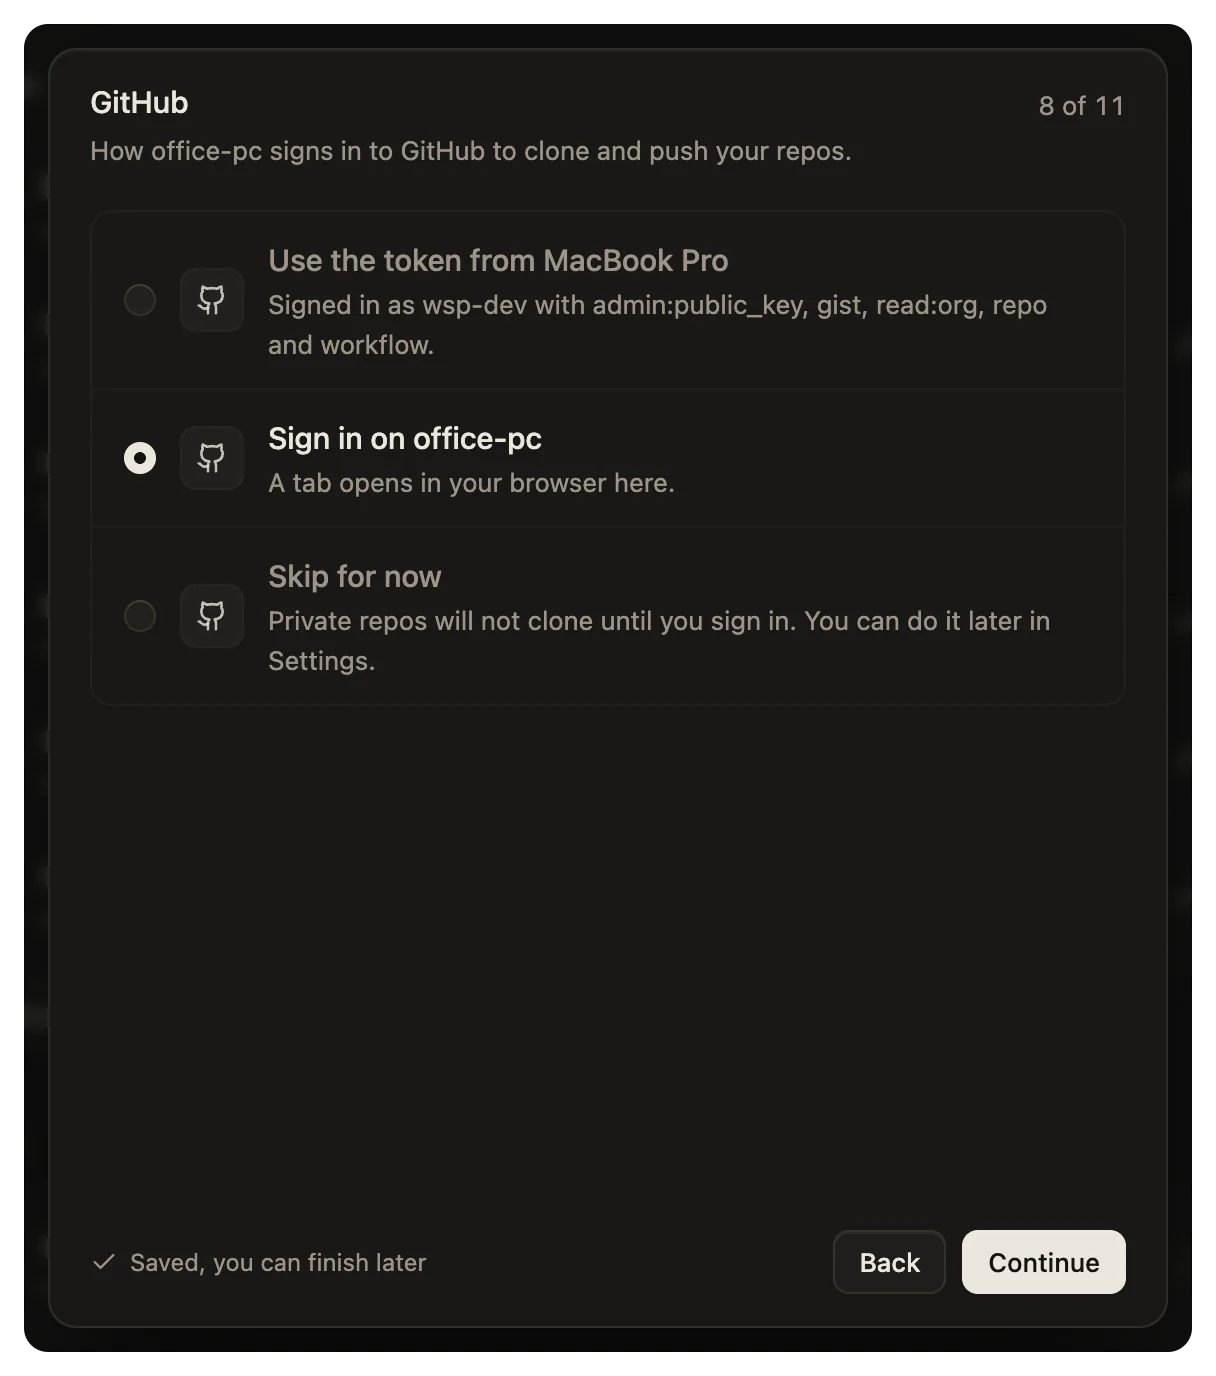
| GitHub | How the new computer signs in to GitHub to clone and push your repos. |
| Import projects | Projects on your computer to clone onto the new computer. |
| Other config | Your git and shell settings, so the new computer behaves like your computer. |
| Summary | What goes on the new computer, before it starts. |
Each list comes from what is on the computer the app runs on and what your agents use there. The CLIs step has Select the ones your agents used. You can close the dialog at any step. Your picks are kept, and the computer waits under Pending in Settings > Computers until you finish.
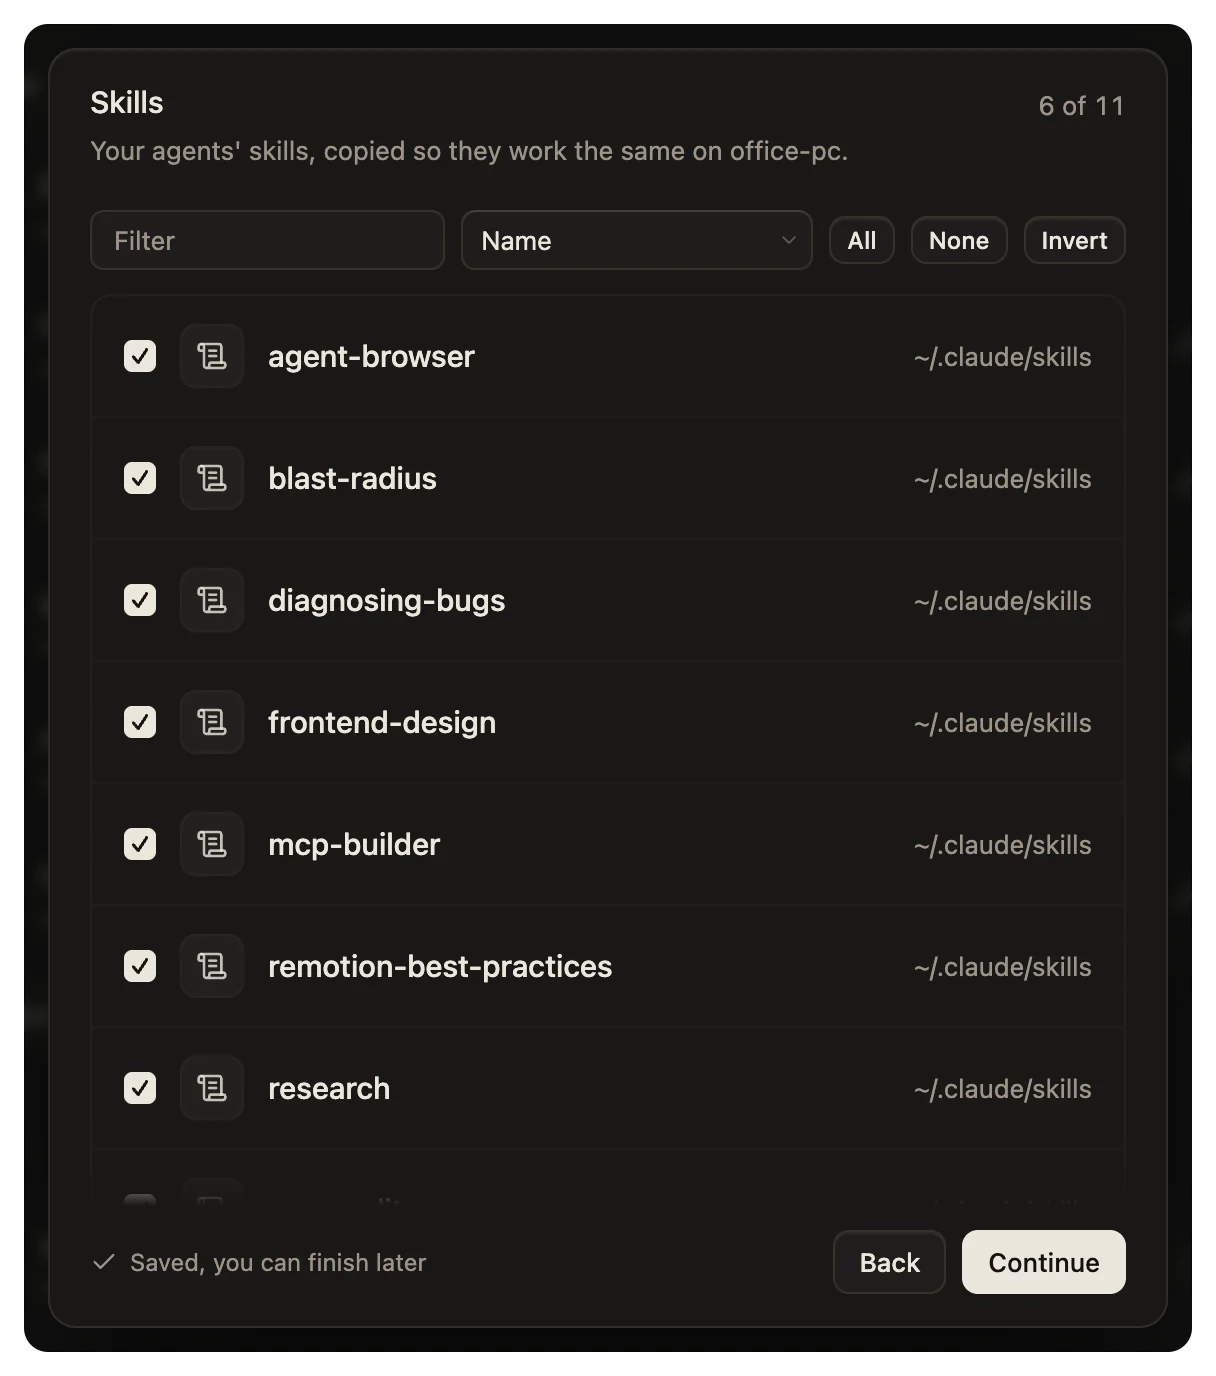
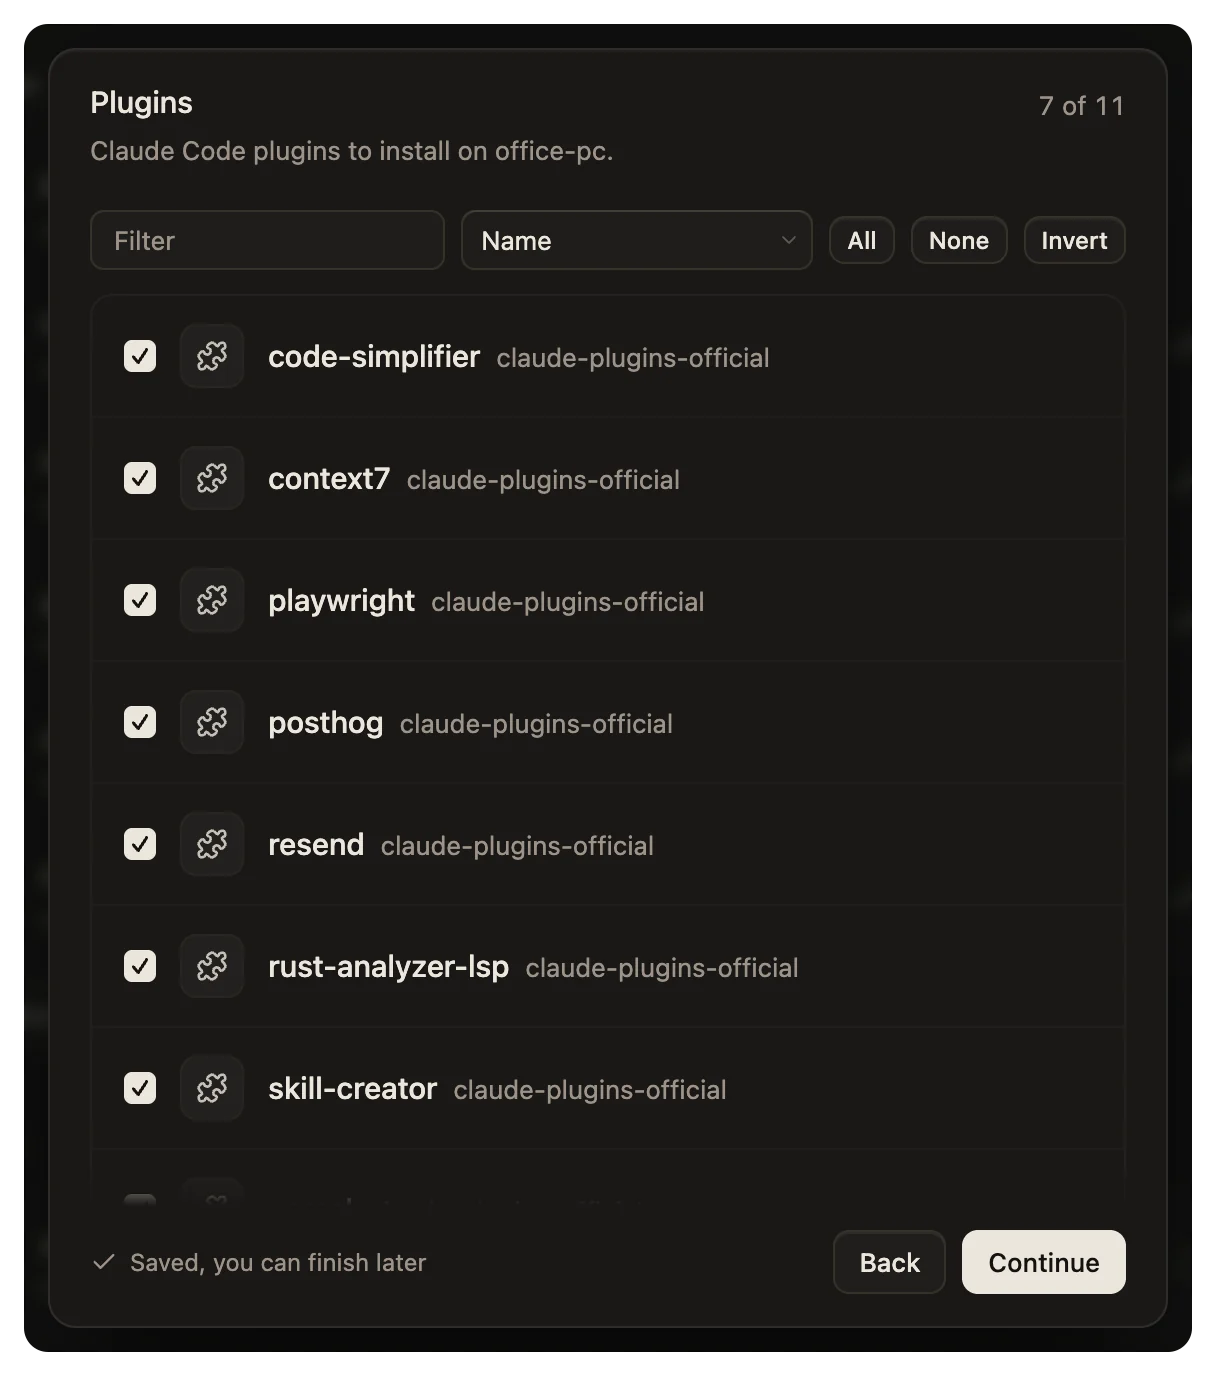
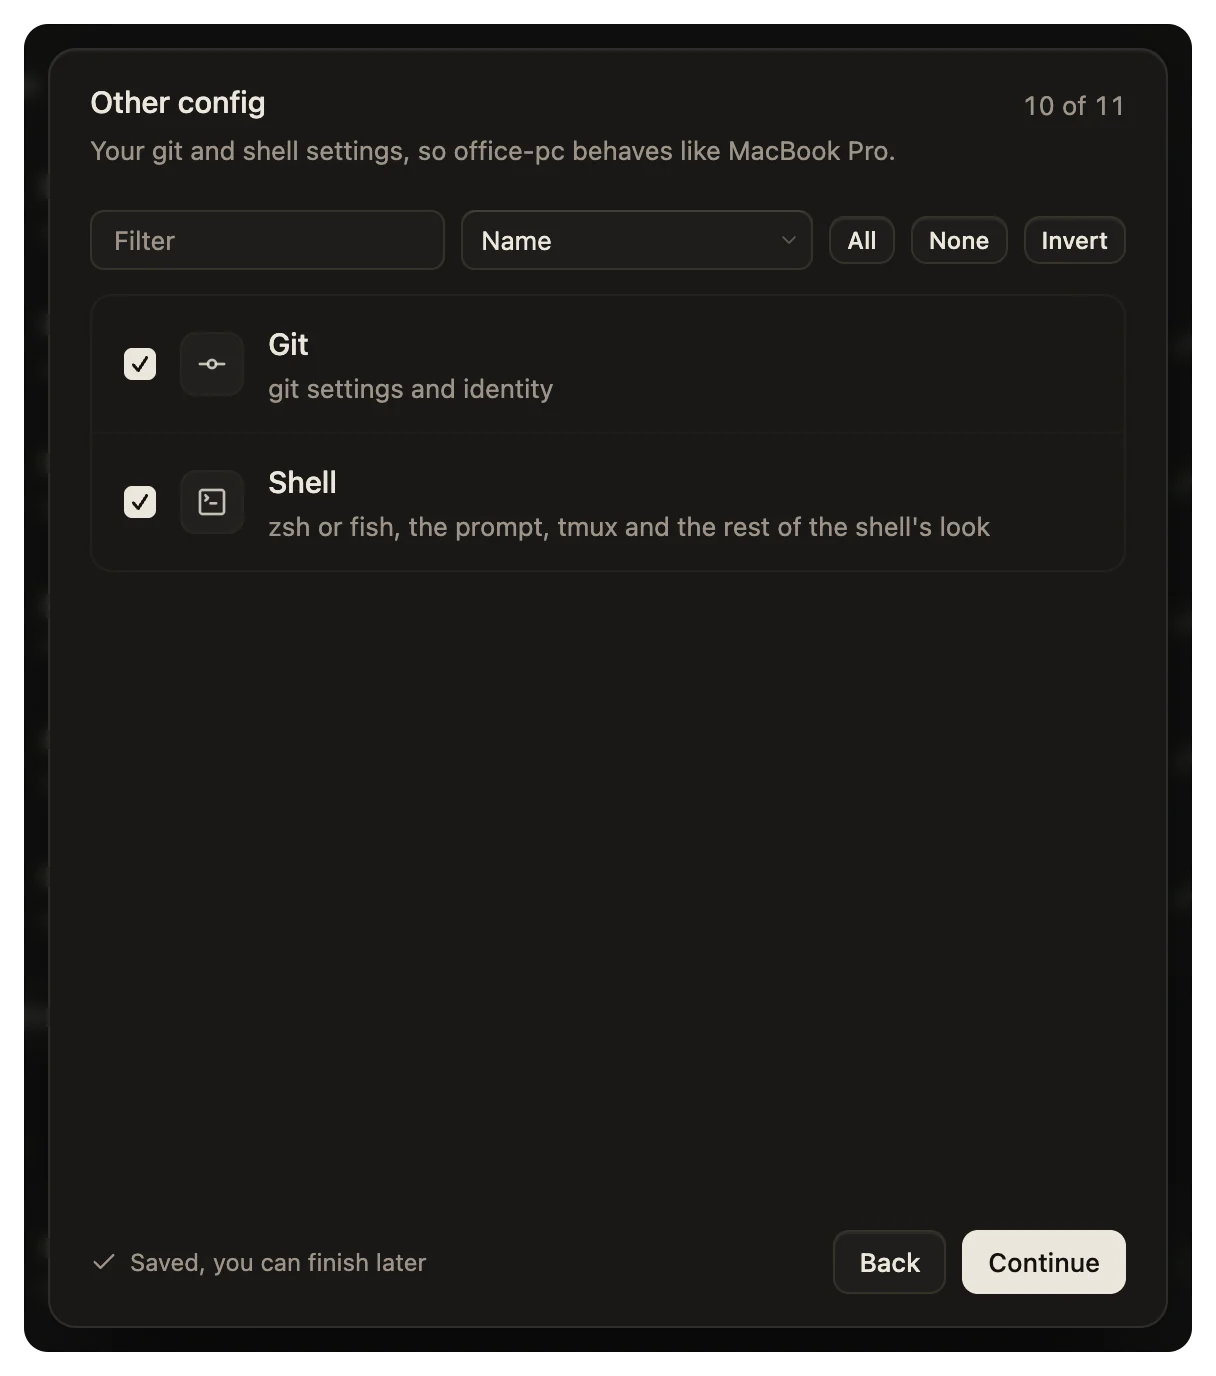
On Summary, wsp lists every pick and the disk they need beside the free disk on the computer. To use the same picks for the next computer, tick Save as a recipe and give the recipe a name. The computer then follows that recipe. See Recipes.
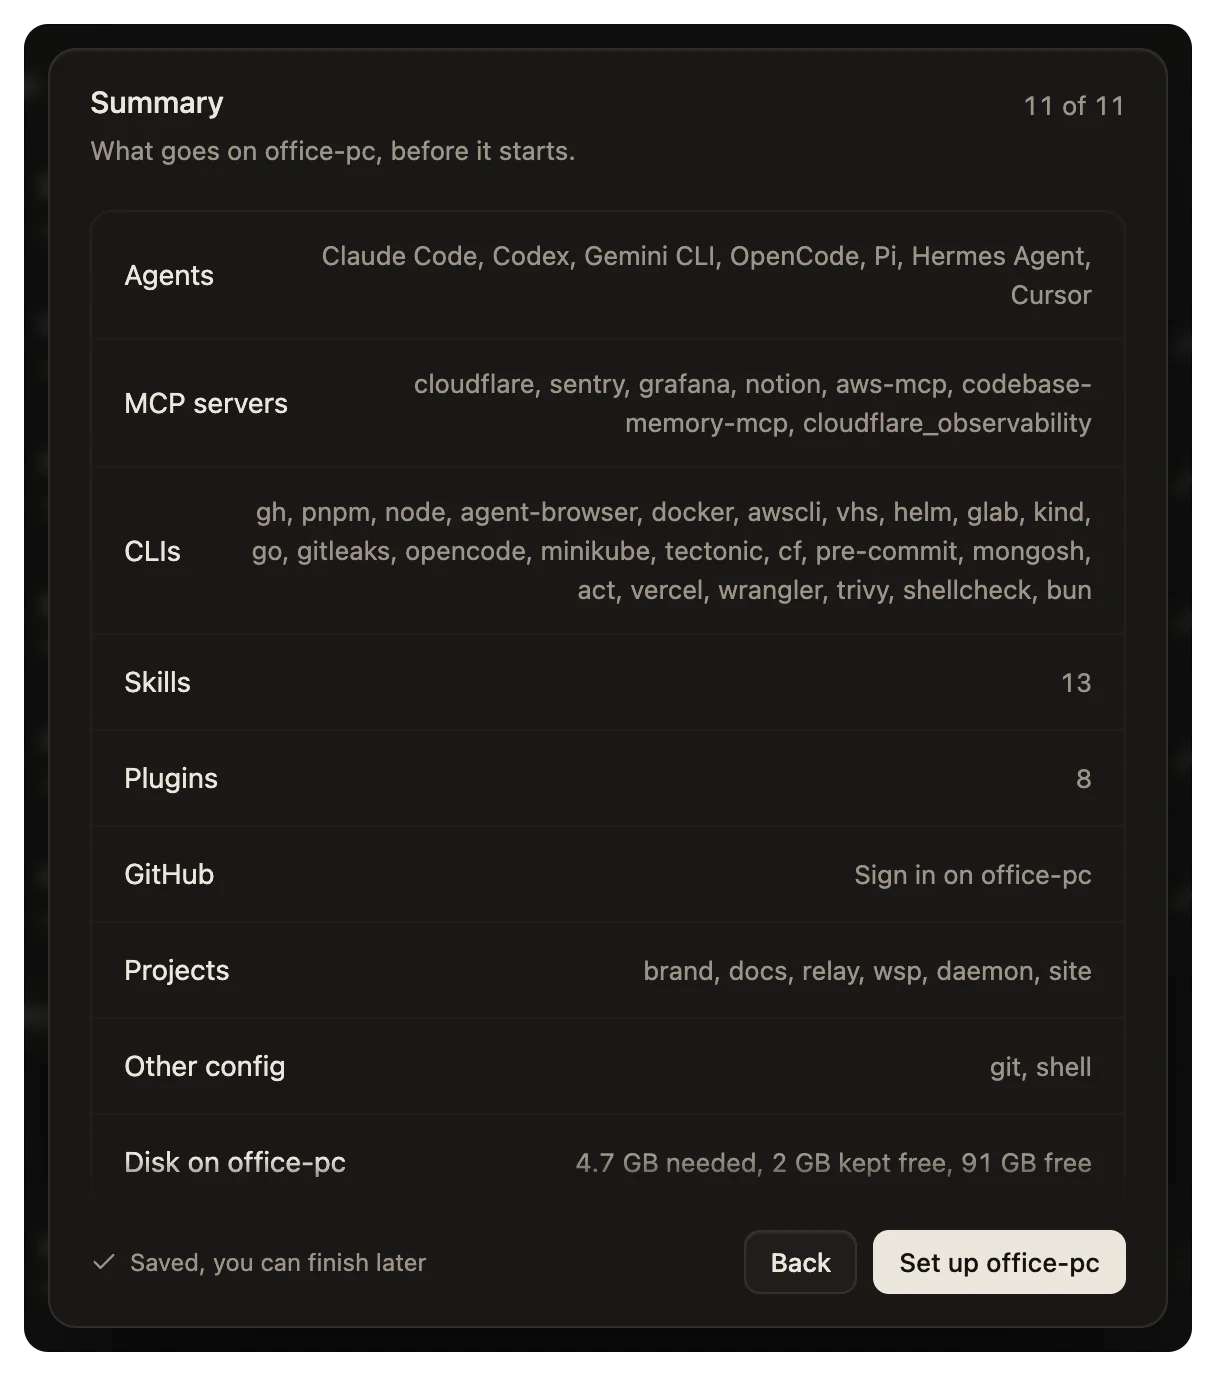
To start, click Set up. The button carries the computer's name, such as Set up studio. While the setup runs, the dialog shows one row per part:
| Row | What it says |
|---|---|
| Install wsp | Installed and connected. |
| Base packages | |
| Agents | Installing |
| MCP servers | Copying |
| CLIs | Installing |
| Skills | Copying |
| Plugins | Installing |
| GitHub | |
| Projects | Importing |
| Other config | Copying |
The sign-ins sit under Agents. Steps that do not depend on each other run at the same time. Click Run in background to close the dialog. The setup goes on, and wsp tells you when it needs you. When it ends, the dialog says the computer is ready and offers Start a task here.
How sign-ins travel
You choose for each agent:
- Copy the key. The token or key stays in the keys file of your host, the
.envfile beside wsp's state. Each turn on the new computer is handed it in its environment. Nothing of the login is written on the new computer. - Sign in on the new computer. wsp runs the agent's own login there and shows it to you. An agent with a device code says with a code.
Copy the key shows only when your host holds that agent's token or key. To put one there, run wsp agents key <agent>. See Agents and sign-ins.
For GitHub, you choose Use the token from your computer, Sign in on the new computer, or Skip for now. If you skip, private repositories do not clone until you sign in later in Settings.
Each MCP server says how it signs in there: no sign-in, its key or token copied, or a sign-in on the new computer. A key written inside a server's definition travels with it.
What an imported project carries
The new computer clones each project you pick from its origin remote. Three more things go with each project by default:
- Every git-ignored file in the folder that wsp knows as configuration. These start ticked, and they can hold secrets. They include
.env,.env.*,.npmrc,.envrc,.pypirc,local_settings.py,config/master.key,*.tfvars,local.properties,*.keystore,*.jks,*.pem,*.key,*.crt,*.p12,.vercel/,.claude/settings.local.jsonandCLAUDE.local.md..env.exampleand.env.samplestay. - The project's Claude Code memory folder.
- The commits that the remote does not have.
In the app, untick a project to leave all of it behind. To pick file by file, add the project from a terminal:
wsp add ~/code/lab --on studio
wsp prints each file that goes with the project, and sends nothing. Then run the line again with --yes, and with any of these:
| Flag | What it does |
|---|---|
--cut <path> | Leaves one path behind. Give it once per path. |
--keep <path> | Sends one more path from the list. Give it once per path. |
--no-memory | Leaves the Claude Code memory behind. |
--no-commits | Leaves the unpushed commits behind. The clone starts at the remote's own tip. |
--remember | Keeps these choices for the folder, for the next add. |
wsp refuses a folder with no origin remote:
<folder> has no origin remote, and the computer clones the repo rather than copying the folder; push it somewhere and add it again
What never travels
Apart from what an imported project carries, wsp copies only what each step names. These never leave your computer:
- Your agents' sessions, transcripts and history. wsp reads histories to count which tools your agents run, and reads only tool names and command words.
- Login files:
.credentials.json,auth.json,.git-credentials,.netrc,hosts.ymland.aws/credentials. If you name one with--keep, wsp refuses. - Any file outside an agent's own config paths, except the git and shell files below. Each agent has a fixed list. For Claude Code, it is
settings.json,CLAUDE.md,agents,commandsand~/.claude.json. Skills go one by one from the Skills step. - The plugins folder. The agent's own command installs each plugin again.
- A link to a folder.
- Folders of build output and caches in a project, such as
node_modules,.venv,target,dist,build,.nextand.cache, and.DS_Store.
From your git config, wsp copies .gitconfig and .config/git/ without these:
- The
credential,url,gpg,include,includeIf,filter,pager,difftoolandmergetoolsections. - Keys that point at a program or a key on your computer, such as
core.sshCommand,core.editor,core.hooksPathanduser.signingKey, andcommit.gpgSignandtag.gpgSign. - Aliases that start with
!, keys named like secrets, values shaped like tokens, and addresses with a login in them.
wsp then adds the gh credential helper, so git on the new computer signs in through GitHub's command line.
From your shell, wsp copies the config of zsh, fish, tmux, starship, zellij, direnv and oh-my-posh, and .oh-my-zsh/custom. Bash files, shell history, fish_variables and any file over 1 MB stay. An exported variable whose name holds KEY, TOKEN, SECRET or PASSWORD is cut out.
A file that is already on the new computer with other content is never overwritten.
From the command line
wsp add root@203.0.113.7
wsp add root@203.0.113.7 --recipe build-box
wsp add studio --resume
| Command | What it does |
|---|---|
wsp add <login or ssh alias> | Adds the computer. Without --recipe, it joins and waits for its picks while the base tools go on. |
--recipe <name> | Puts the recipe's picks on the computer. |
--name, --ssh-port, --ssh-key, --host-key | Name the computer and say how to reach it over ssh. |
wsp add <computer> --resume | Goes on with an add that stopped. |
wsp add <computer> --sign-in <agent> | Runs an agent's sign-in on that computer. |
See wsp add for every flag.