A rented server
This guide adds a server that you rent from a hosting company to wsp, over ssh. After that, threads run on the server in its own project folders, and you work with them in the app on your own computer. The host stays on your computer. The server runs only the wsp daemon.
Before you start
The server must have:
- Linux on
x86_64oraarch64. A Mac cannot be a box. - systemd, and cgroup v2 with the
memoryandcpucontrollers. - The overlay filesystem in its kernel.
- Node 22 or newer, for the
wspcommand that sits beside the daemon. - A root login over ssh with a key. wsp runs threads on a box only as root for now. wsp never types an ssh password, so the key must work without one.
- Root's login shell set to bash or sh.
- Free space on
/opt/wspfor the base tools, plus 1 GiB.
On your computer, you need wsp and a running host. The app starts the host. Without the app, a wsp command starts one by itself. That host takes a free port for boxes at its first start and asks for the same port at every start after, so the server keeps reaching it.
Step 1: Read the server's host key on the server itself
The first time wsp dials a server, it shows the key that the server answers with and asks you to trust it. If a stranger controls the route during that first dial, wsp records the stranger as your own box. So compare the key with one that you read on the server itself.
Do not test the login with ssh first. Your ssh client then stores the key at its own prompt, and wsp add finds a key that it already holds and asks nothing.
Open a shell on the server through the web console of your hosting company, and run:
ssh-keygen -lf /etc/ssh/ssh_host_ed25519_key.pub
node --version
Keep the SHA256: fingerprint for step 2. If the version is below v22, install Node 22 or newer with the server's package manager. Also make sure that your public key is in /root/.ssh/authorized_keys.
If your ssh client already connected to this server once, wsp add asks nothing, because ~/.ssh/known_hosts holds a key for it. Then compare the key that your computer holds with the fingerprint from the server:
ssh-keygen -l -F 203.0.113.7
Step 2: Add the server
You can add the server in the app or on the command line.
In the app, open Settings > Computers and click Add a computer. In the first step, pick the server from the hosts in your ssh configuration, or type root@203.0.113.7. Then go through the steps of the dialog, from the checks to the summary.
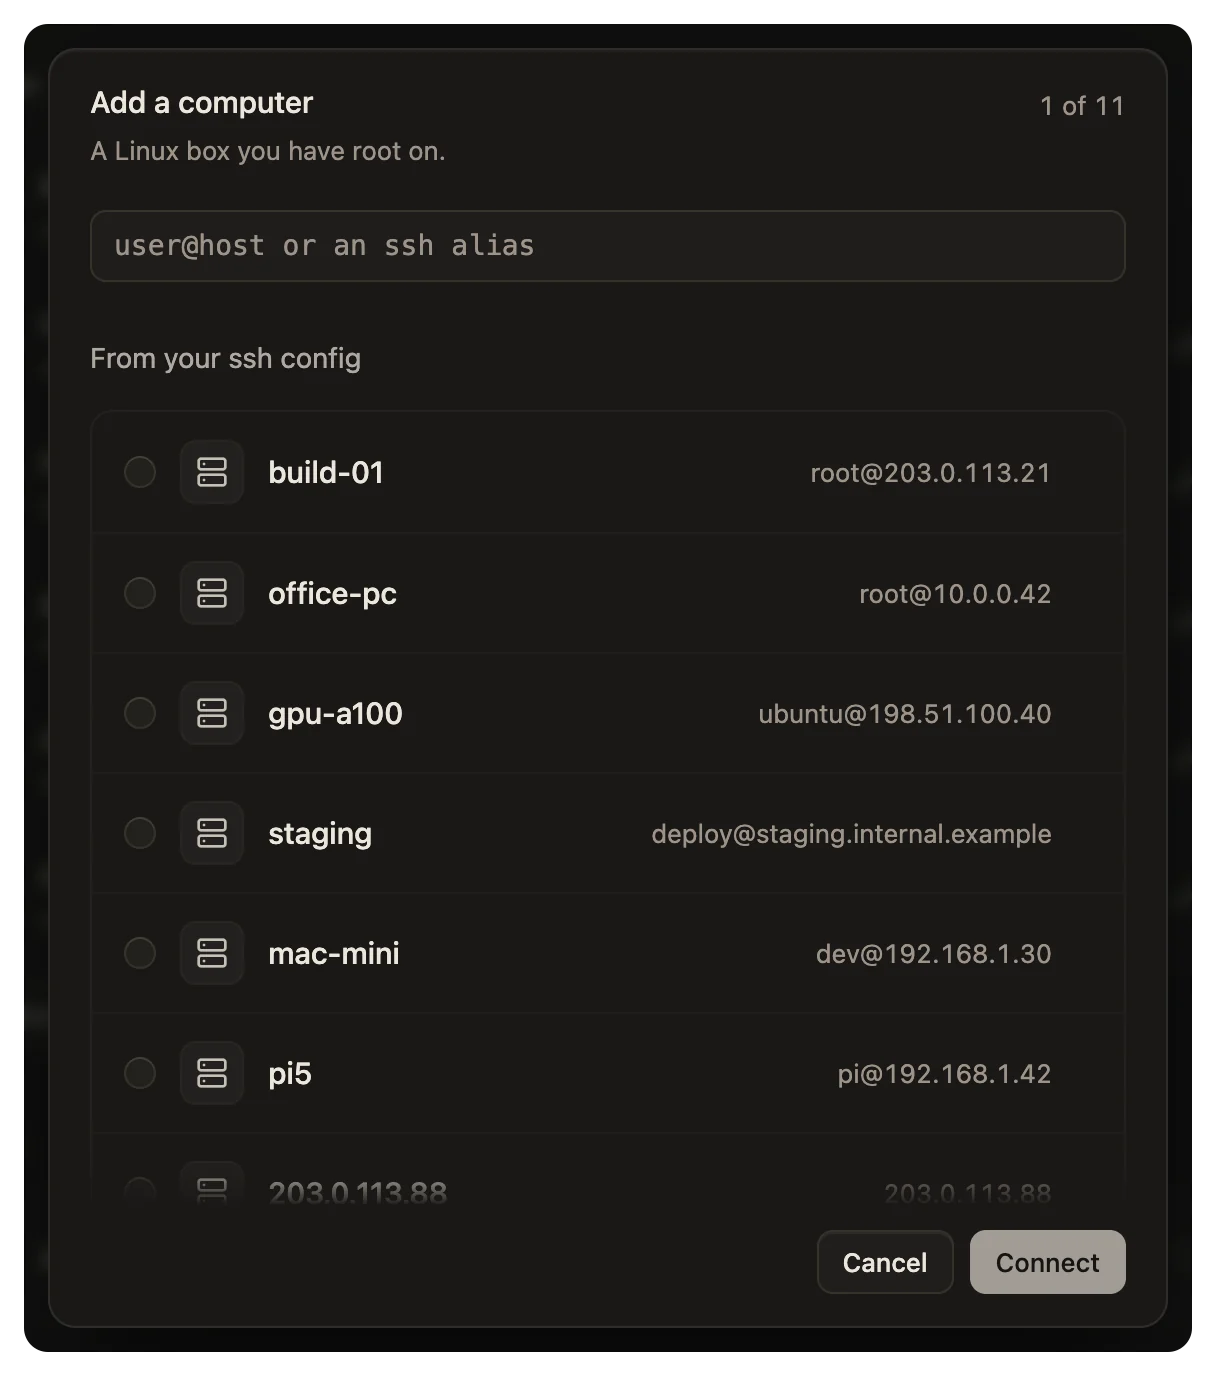
On the command line, name the server:
wsp add root@203.0.113.7 --name vps
wsp asks about the host key:
root@203.0.113.7 answers with the key ssh-ed25519 SHA256:...; trust it and continue?
Compare the fingerprint with the one from step 1. Answer yes only if they are the same.
If you run the add without a terminal, for example from an agent, wsp cannot ask. Give the key on the line instead:
wsp add root@203.0.113.7 --name vps --host-key 'SHA256:...'
--host-key takes the fingerprint alone or the whole ssh-ed25519 SHA256:... word. If the server answers with another key, the add stops before it sends anything. But ssh has already written that other key into your known_hosts, so a second add without --host-key trusts it without a question. Before you add the server again, run the ssh-keygen -R line that the refusal prints, which takes that key out.
Other flags of the add:
--recipe <name>sets the server up from a saved recipe. Step 4 shows how to save one.--ssh-port <port>for an ssh port other than 22.--ssh-key <path>for a key that your ssh configuration does not name.--laterto go past sign-ins that wait for you, and finish them afterwards.
Step 3: Watch the install
The add prints each step as it goes:
connecting over ssh
remembering the box's host key in ~/.ssh/known_hosts
checking it can run wsp
reading its chip and system
checking it logs in as root
checking for systemd and cgroup v2
checking it has room for the base tools
checking it can reach this computer
installing wsp
starting the agent
waiting for it to connect to this computer
wsp installs the daemon under /root/.wsp, a system unit wsp-place-<tag>.service and the base tools under /opt/wsp. As soon as the server joins, the add prints:
vps joined this wsp, 4 cores, 8 GB, 61 GB free
its ssh key      ssh-ed25519 SHA256:...
wsp remove vps takes it back out and sweeps wsp off it.
Step 4: Choose what goes on the server
A recipe is the list of agents, tools, MCP servers, skills, plugins and configuration that a computer gets. Recipes shows them in the app.
Without --recipe, the base tools go on, and the server waits for you to choose the rest:
vps waits on what goes on it, with the base tools going on meanwhile: choose in the app's Add a computer, or run wsp add vps --resume --recipe <name>
Choose in the app's Add a computer. When the server is set up, save its picks as a recipe, so that your next box can take the same list:
wsp recipes save mine --from vps
wsp add root@198.51.100.4 --name vps2 --recipe mine
After the save, vps follows mine. When mine changes later, wsp applies the change to vps, and to each other computer that follows mine, with no step from you. wsp recipes lists the recipes that you saved. A recipe cannot be saved from the computer that the app runs on.
The setup puts on the base tools first. Then it runs the other steps, several at once where one does not wait on another:
- The agents, then their sign-ins.
- The command line tools, then the MCP servers that run them, then the plugins.
- The skills.
- git and the shell.
- The GitHub sign-in, then the folders as projects. A clone waits for the GitHub sign-in.
Last, it writes what the agents read about this computer. If one step fails, the setup says why and goes on with the others. Only the base tools and the agents stop it.
Step 5: Sign in on the server
The agents and gh sign in on the server, not on your computer. When a sign-in waits for you, the add prints a line with the page and the code, and it opens the page in your browser:
? GitHub waits on you to sign in at https://github.com/login/device with code 8F4A-C21B
Sign in in your browser. The add goes on when the tool says that it is signed in. If you used --later, run wsp add vps --resume to finish the sign-ins. How sign-ins reach your browser explains the path of the page.
Step 6: Add a project and start a thread
Clone a repo on the server as a project:
wsp add https://github.com/acme/api --on vps
wsp clones it into a folder in root's home on the server. wsp projects lists the project with its name. Start a thread on it by that name:
wsp run api "Read the README and run the tests."
The thread runs in the project's folder on the server, as root, and it shows in your sidebar.
If the server cannot reach your computer
The daemon on the server always dials your host. A rented server usually cannot reach a computer at your home or office. Then the host keeps an ssh connection to the server open, with a reverse forward, and the daemon dials back through it. The install says dials back over ssh. For this, the server's sshd must allow TCP forwarding, which it does by default.
If the forward fails too, the add stops before it installs anything, with ssh's own words in the brackets:
root@203.0.113.7 cannot reach this computer at ... and the forward back over ssh did not stand (...); link this host to your relay, or start it with --advertise naming an address it can reach
Then link your host to the relay with wsp host link, as A box behind a firewall shows, and add the server again.
Set how many threads run at once
A box runs a limited number of threads at once. The default is one thread for each 2 GB of memory, at least one, and at most twice the number of cores. To change it:
wsp computers set vps --threads 4
A thread over the limit waits for a slot and starts by itself. It says why it waits:
waiting while vps is running 2 of 2 threads
In the app, the waiting thread has Raise threads at once. wsp computers set vps --reset threads goes back to the default.
Update and remove the server
When the host is newer than the daemon on the server, the server's row says so. To update the daemon:
wsp add vps --update
To take wsp off the server:
wsp remove vps
The remove asks first. It stops if work on the server is on no remote, unless you add --force. It deletes wsp's files on the server and leaves your project folders.
Next
- A computer at home adds a computer on your own network.
- What is stored where lists what wsp puts on a box.